Character consistency in generative AI: keeping a face on model, from first draft to print
A diffusion model will happily draw your hero a hundred times — and give you a hundred slightly different people. Making one character stay recognisable across scenes, and sharp enough to print, is its own craft.
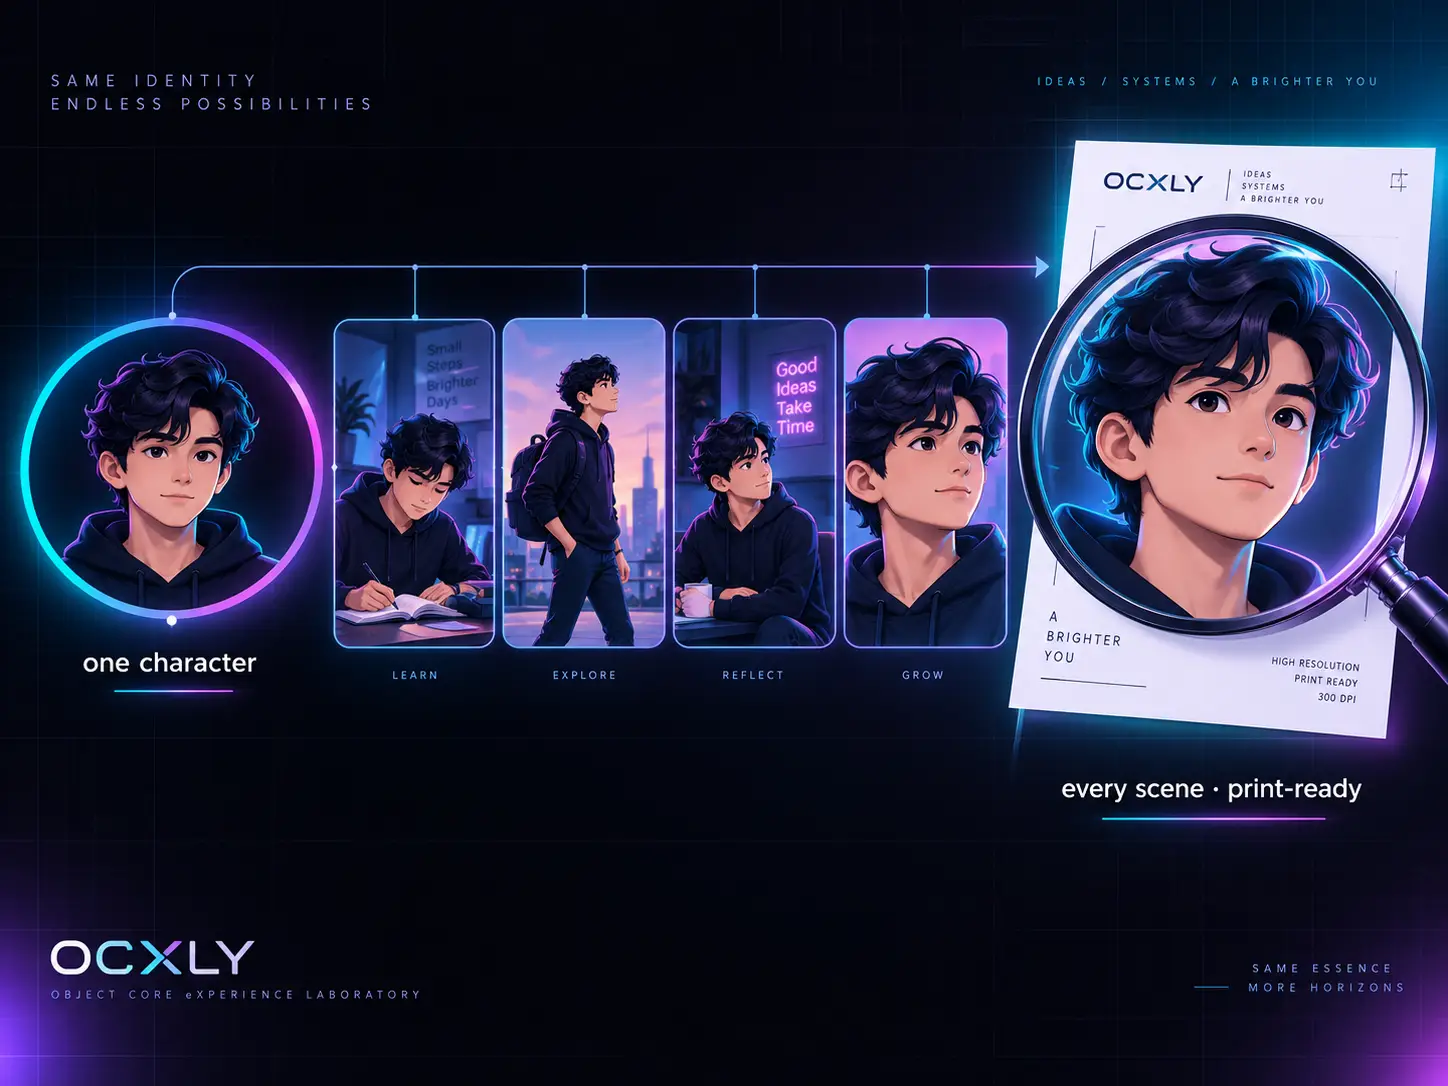
Digital publishing runs on repeatable visual assets: the same protagonist across a chapter's illustrations, a mascot on every landing page, an author's likeness in a series of covers. Generative image models are astonishingly good at making a beautiful picture and surprisingly bad at making the same character twice. This piece walks through the two problems you actually have to solve — keeping a character consistent, and getting the result to print resolution — and the techniques, from prompt tricks to fine-tuning to super-resolution, that solve them.
01Why a model forgets a face
A text-to-image diffusion model does not store your character anywhere. Each generation starts from fresh random noise and denoises it toward whatever the prompt describes. "A young woman with red hair and green eyes" describes an entire space of plausible people, and the random seed picks one point in it. Change the seed and you get a different valid answer to the same prompt — a different face that still fits the words.
That is the whole problem in one sentence: the prompt constrains the category, not the individual. Human identity lives in dozens of fine, correlated details — the exact distance between the eyes, the shape of the jaw, a particular nose — that no reasonable text description pins down. Consistency techniques are all, at bottom, ways of feeding the model that identity as something stronger than words: a fixed seed, a reference image, or a learned token that means this specific person.
02Prompt-level consistency: seeds, sheets, and reference images
The cheapest techniques need no training at all. The first is seed locking: reuse the same random seed with the same prompt and you reproduce the same image; change only a few words (the pose, the background) and much of the identity carries over, because the seed anchors the starting noise. It is fragile — large prompt changes drift the face — but it is free and instant.
The second is a detailed character sheet: instead of "a young woman," you write a dense, reusable block of specifics — age, exact hair and eye colour, face shape, distinctive marks, wardrobe — and paste it into every prompt. More constraint means less room for the seed to wander. It never achieves true identity lock, but for a stylised or minor character it is often enough.
The most reliable no-training option is a reference image. Modern tools let you hand the model a picture of the character and ask it to keep that likeness. Midjourney built this into its workflow — the --cref (character reference) parameter in version 6, succeeded by the more general Omni Reference in version 7, with a weight control to dial how strongly the reference is enforced.7 Google's Gemini 2.5 Flash Image (nicknamed "Nano Banana") takes it further, preserving facial structure and character identity across conversational, multi-turn edits so a subject stays recognisable from scene to scene as you describe changes in plain language.8 These are the practical default for most publishing work today — but their makers are candid that fine details (freckles, a logo, a precise hairstyle) may not match perfectly, so a review-and-rerun loop is still part of the job.7
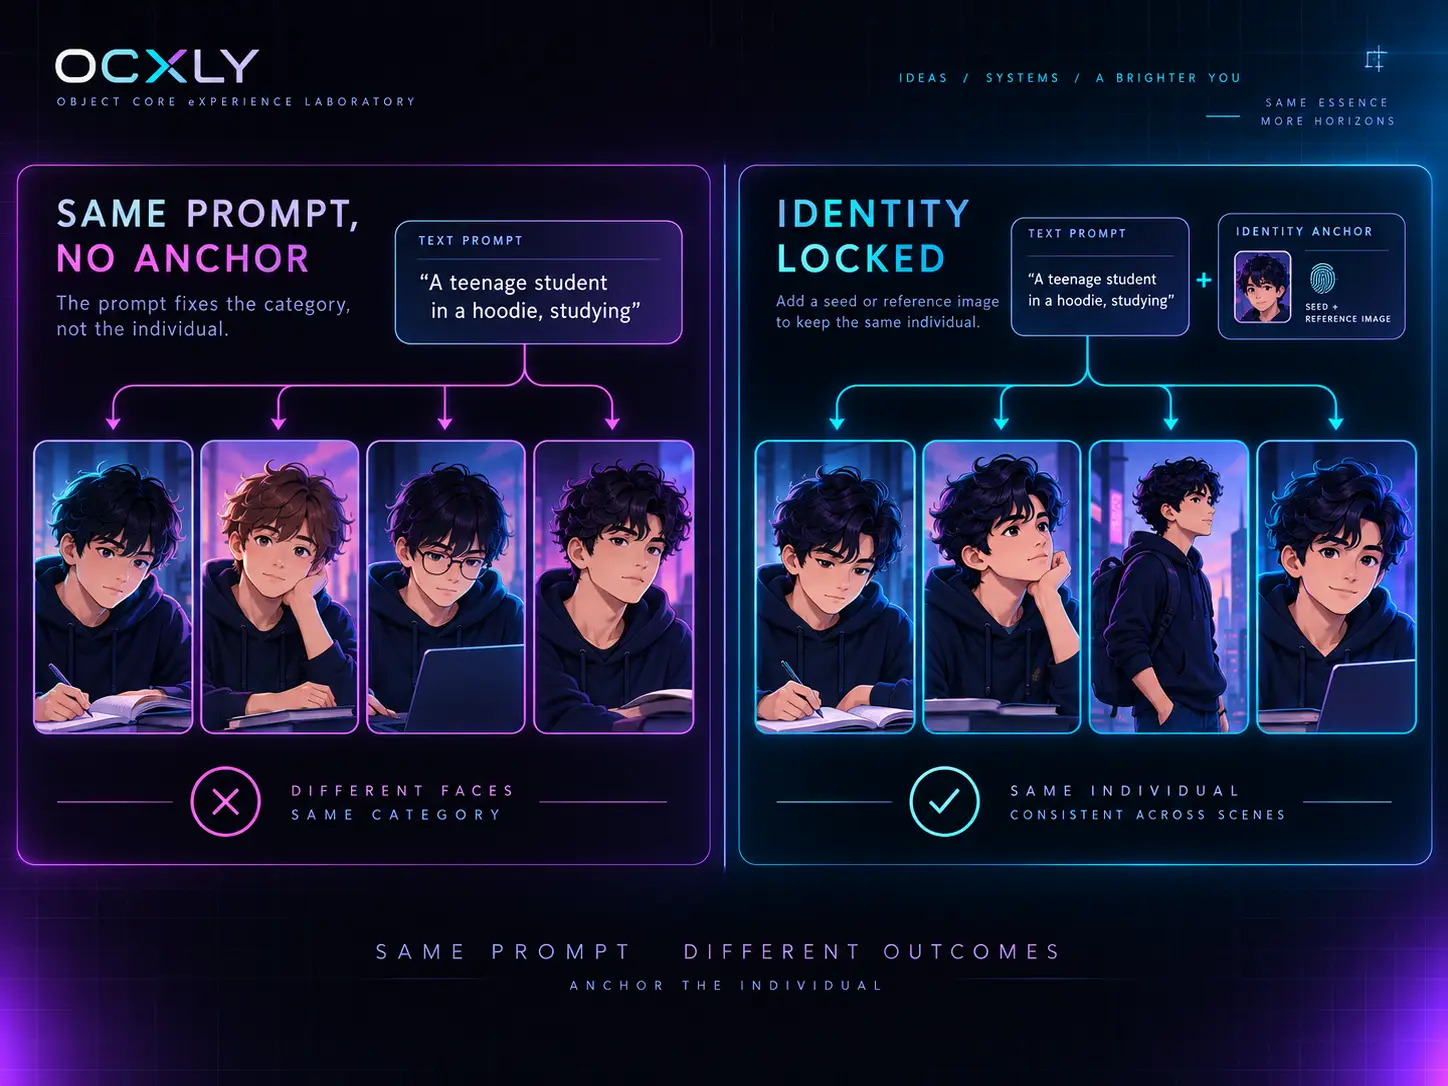
The prompt tells the model what kind of person to draw. Consistency is about telling it which person — and words alone can't.
03Teaching the model a character: inversion, DreamBooth, LoRA
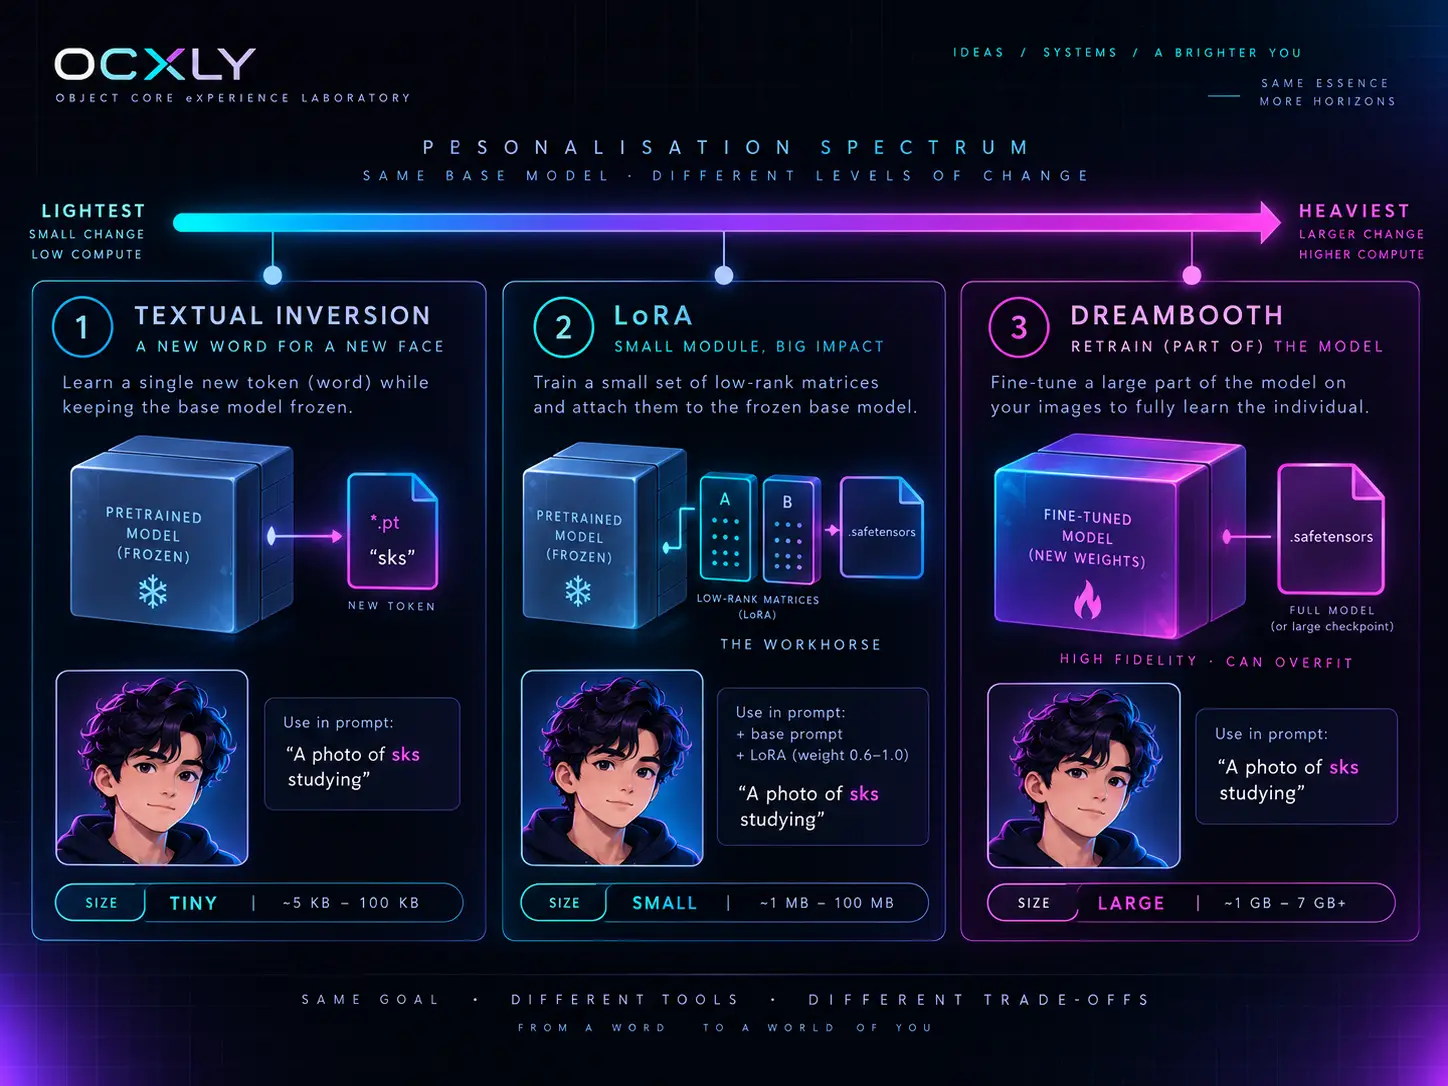
When you need the same character across dozens of images and many styles, it is worth teaching the model who they are. Three techniques sit on a spectrum from lightest to heaviest.
Textual Inversion is the lightest. You freeze the whole model and learn a single new "word" — a text embedding — from a handful of reference images, so that this new pseudo-token comes to mean your specific subject.1 Nothing about the model's weights changes; you have just taught it a new name. It is tiny to store and share, but its capacity is limited, so identity fidelity can be hit-or-miss.
DreamBooth goes to the other extreme: it fine-tunes the model's actual weights on your subject, binding it to a rare token so the model learns to render that individual in new poses and contexts.2 Fidelity is high, but it is heavy to train and store, and on only a few images it tends to overfit — memorising the training shots and losing flexibility.
The workhorse in between is LoRA (Low-Rank Adaptation). Rather than updating all the weights, LoRA freezes the base model and trains a small pair of low-rank matrices that adjust the attention layers — a fraction of the parameters, a small file, most of the fidelity.3 A character LoRA (often trained DreamBooth-style) is the standard way serious creators ship a reusable, portable identity: a few megabytes you can load onto a base model whenever that character is needed, and combine with style LoRAs for a house look.
04Zero-shot identity: adapters that skip the training
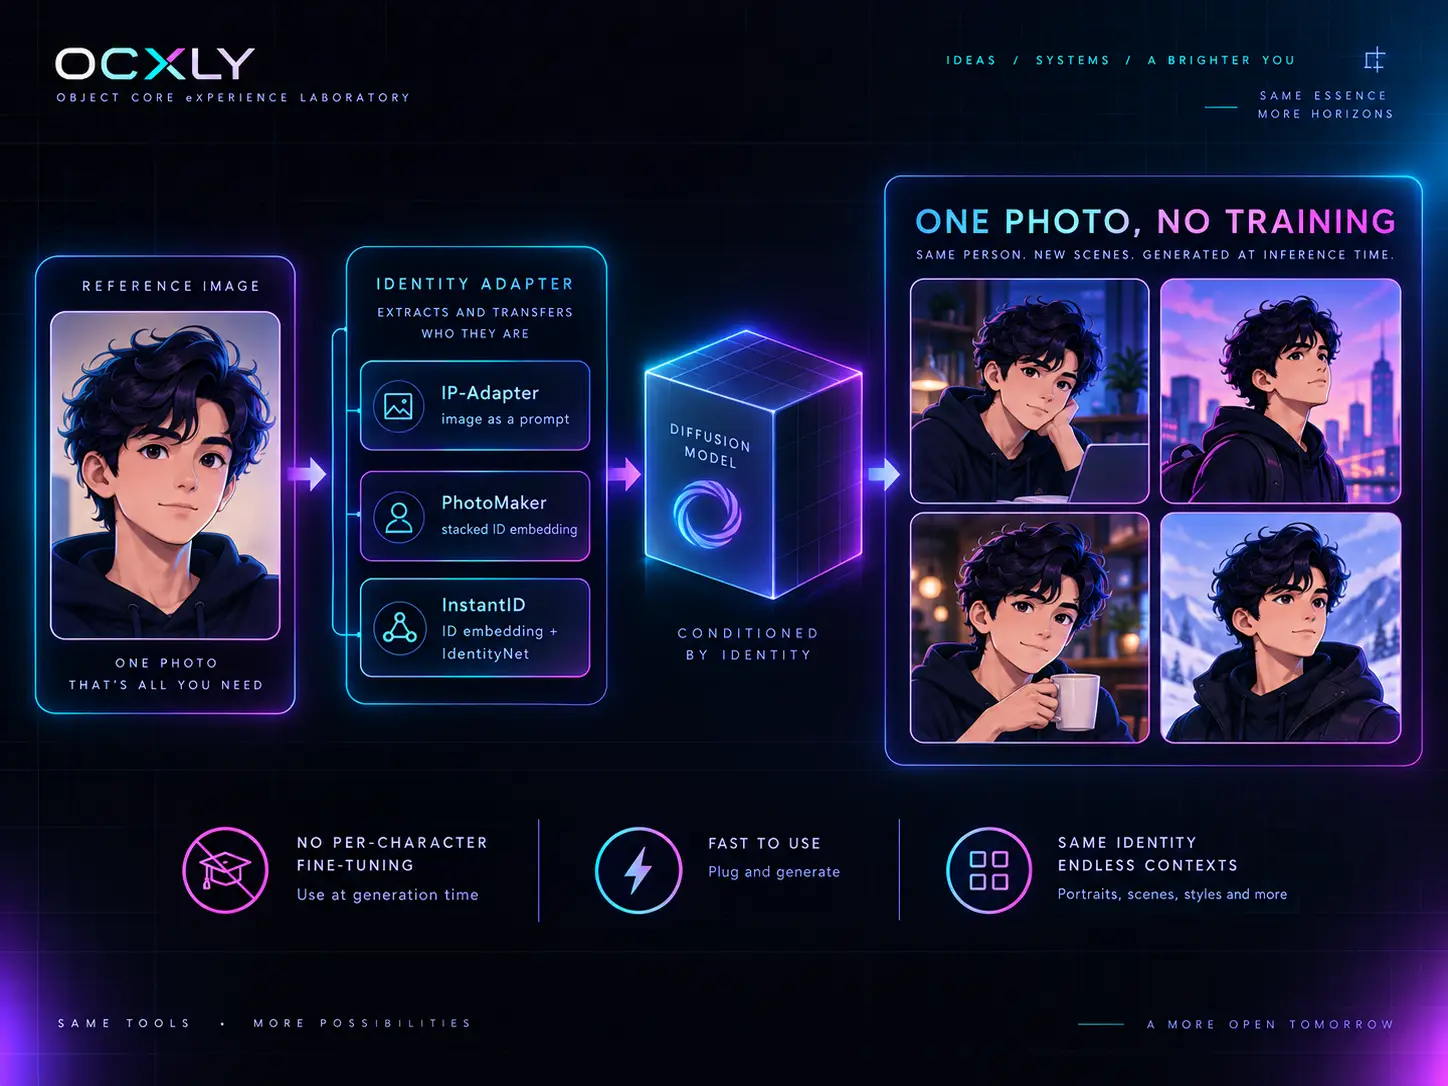
Training a LoRA takes time and images. A newer family of methods gets identity from a single reference photo with no per-character training at all — you supply the face at generation time and the model conditions on it directly.
IP-Adapter made this general: a lightweight adapter with a decoupled cross-attention mechanism that lets an image act as a prompt alongside the text, so "this face, doing this" becomes a single instruction.4 PhotoMaker specialised it for people, encoding one or more ID photos into a stacked identity embedding that preserves the person while still obeying the text prompt.5 InstantID pushed fidelity higher again: from a single facial image it builds a robust ID embedding and adds an IdentityNet for spatial control, all as a plug-and-play module needing no fine-tuning at inference and working with off-the-shelf diffusion models.6
For a publisher, the trade is clear. Zero-shot adapters are fast and need no training pipeline, which is ideal for turning a real author's likeness or a single concept sketch into a scene. A trained LoRA still tends to win on the hardest consistency — a fully invented character rendered across many wildly different shots — because it has learned that identity in depth rather than inferring it from one photo.
05The resolution gap: why publishing needs upscaling
Solve identity and you still have a size problem. Most text-to-image models generate natively at around one to two megapixels — roughly 1024×1024 pixels for a model like SDXL. That looks crisp on screen and is nowhere near enough for print.
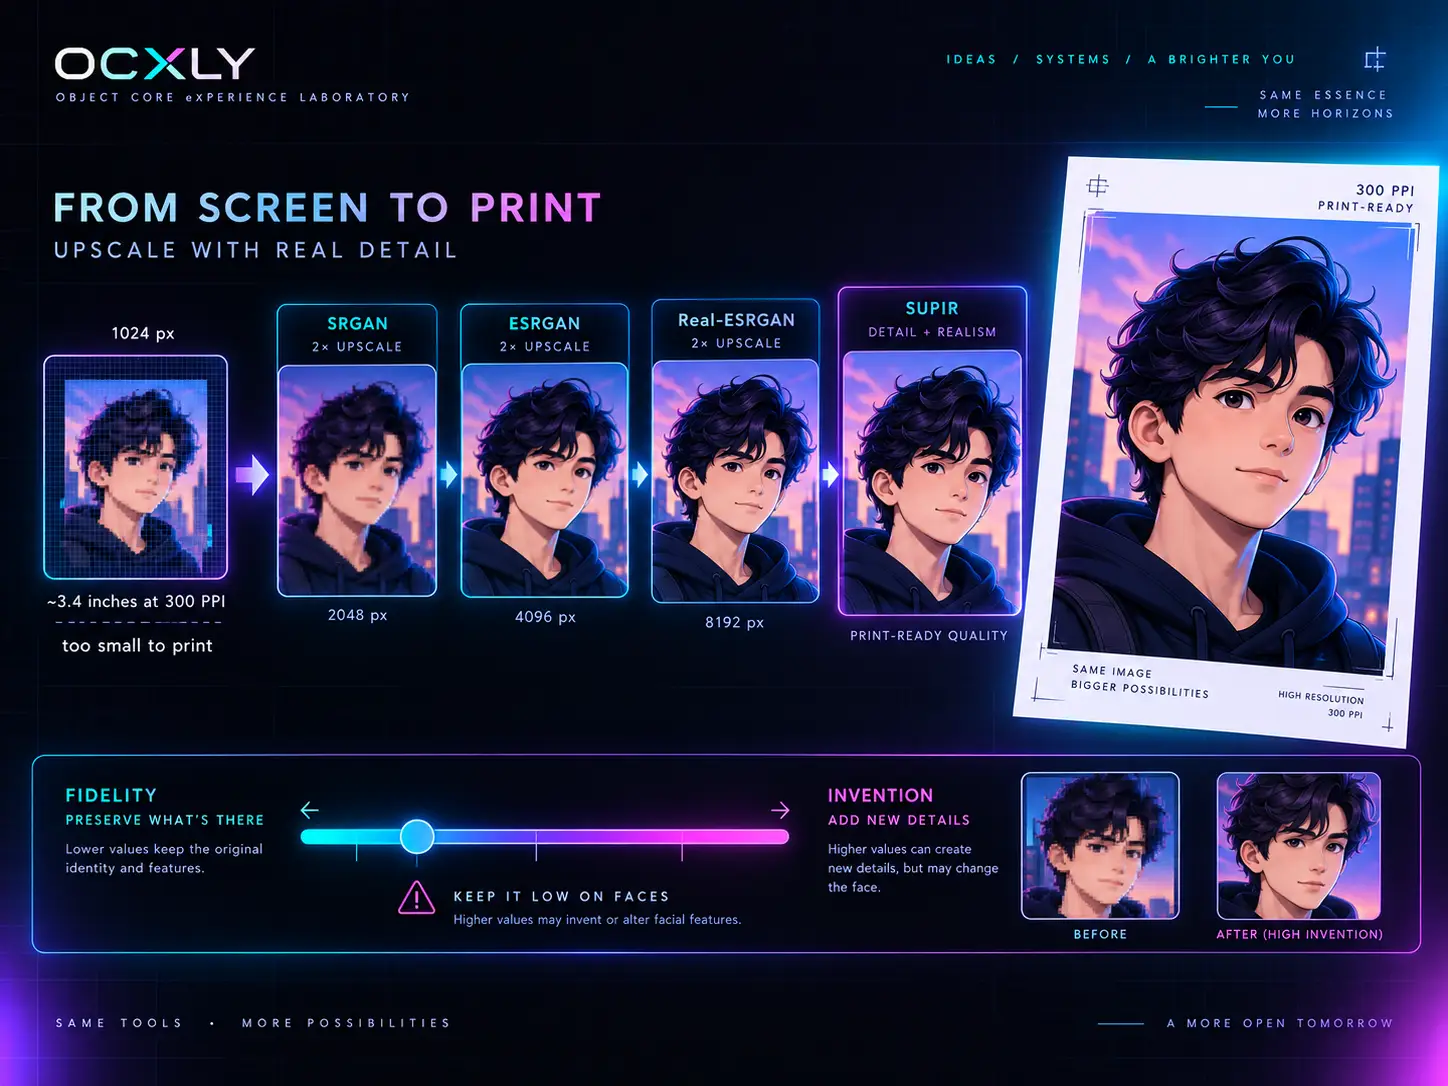
Print is measured in pixels per inch, and the working standard for quality printing is 300 PPI. Do the arithmetic: a 1024-pixel image at 300 PPI is about 3.4 inches wide — smaller than a postcard. A 6×9-inch book page needs roughly 1800×2700 pixels; a full-bleed cover with margins, more still. The native generation is short by a factor of two to four in each dimension. Simply stretching it (bicubic scaling) invents no new detail — it just makes the softness bigger. To go from a screen-sized generation to a printable asset without it turning to mush, you need super-resolution: upscaling that adds plausible detail rather than merely interpolating.
06How super-resolution learned to invent detail
Early upscaling was pure interpolation — bicubic and friends — which cannot add information that was never captured. The leap came from learning what real detail looks like and hallucinating it back in. SRGAN (2017) was the first framework to produce photo-realistic detail at large upscaling factors, using a generative adversarial setup: a generator proposes a high-resolution image while a discriminator learns to tell its output from genuine high-res photos, pushing the generator toward realistic texture rather than the blurry average that pixel-error losses produce.9
ESRGAN (2018) sharpened this substantially, introducing Residual-in-Residual Dense Blocks, removing the batch-normalisation layers that were creating artifacts, and improving the perceptual and adversarial losses to yield more realistic, better-detailed textures.10 But both were trained on cleanly downsampled images, so they struggled on real-world inputs full of compression, noise, and blur — exactly the state an AI generation or a web image tends to arrive in.
Real-ESRGAN (2021) closed that gap. By training on a rich, synthetic model of real-world degradation — the JPEG artifacts, noise, and blur images actually accumulate — it became far more robust on messy inputs, which is why it remains a popular, fast default for general-purpose upscaling.11 For AI-illustrated publishing, a Real-ESRGAN pass is often the quickest way to double or quadruple resolution while cleaning up generation noise.
07Diffusion upscalers and the faithfulness dial
The current frontier uses the same diffusion priors that generate images to restore them. SUPIR (Scaling-UP Image Restoration, 2024) builds on a large SDXL-based generative prior, trained on twenty million high-resolution images with descriptive captions, and even lets you steer the restoration with a text prompt.12 The result can synthesise strikingly convincing skin, hair, and fabric detail at high magnification — well beyond what a GAN upscaler recovers.
That power comes with a dial you must set consciously: fidelity versus invention. A diffusion upscaler is, by nature, generating detail that was not in the input. Turn it up and it will confidently invent texture — sometimes beautiful, sometimes wrong, and on faces sometimes subtly not your character any more, which quietly undoes all the consistency work upstream. This is why upscaling is the last step, done gently on faces, and why creators pair it with dedicated face-restoration models (such as GFPGAN or CodeFormer) and tiled or region-based upscaling that treats the face with more restraint than the background.
A GAN upscaler cleans and sharpens what is there. A diffusion upscaler invents what could be there. For a consistent character, you want the first instinct on the face and the second only where it can't hurt.
08A pipeline for a publishing project
Putting it together, a repeatable workflow for consistent, print-ready assets looks like this:
- Define the character once. Generate a clean, front-facing "hero" portrait you are happy with, plus a short character sheet of fixed traits. This is your ground truth.
- Lock identity. For a small job, feed that portrait as a reference image (Omni Reference, Gemini, or an IP-Adapter/InstantID pipeline). For a large one, train a character LoRA from a handful of consistent shots so the identity is portable and reusable.
- Generate the assets — the poses, scenes, and compositions the project needs — reusing the locked identity and reviewing for drift, re-rolling the ones that stray.
- Upscale to print size. Run a super-resolution pass (Real-ESRGAN for speed and cleanup, or a diffusion upscaler like SUPIR for maximum detail) to reach the pixel count your page or cover needs at 300 PPI.
- Restore and finish. Apply gentle face restoration, check that the upscale did not alter identity, then colour-correct and lay out.
The order matters: identity first, resolution last. Upscaling before you have a consistent character just gives you a very sharp picture of the wrong face.
09Where OcxlyDev lands
There is no single button for this yet, and anyone selling one is overstating it. The honest state of the art is a pipeline: reference prompting or a LoRA to hold identity, a super-resolution stage to reach print resolution, and a human in the loop reviewing for the drift that every method still produces. The tools are improving fast — native-consistency models like Gemini 2.5 Flash Image are collapsing steps that used to need training — but the discipline is the same.
Our take for publishing work: invest in one strong identity anchor per character (a LoRA for anything recurring, a good reference image for one-offs), keep upscaling as a deliberate final pass with the fidelity dial low on faces, and never skip the review. Consistency is not a model feature you switch on; it is a process you run — and the projects that respect that are the ones whose characters actually look like themselves from page one to the end.